32 minutes read
Introduction and definition of terms Machine embroidery
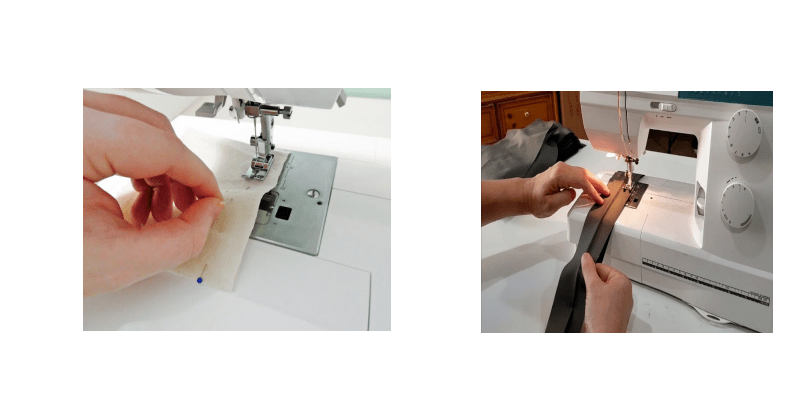
Machine embroidery is an embroidery process where by a sewing machine or embroidery machine is used to create patterns on textiles.
It is used commercially in product branding, corporate advertising and uniform adornment. It is also used in the fashion industry to decorate garments and apparel. Machine embroidery is used by hobbyist sand crafters to decorate gifts, clothing, and home decor. Examples include designs on quilts, pillows, and wall hangings
Domestic embroidery machine
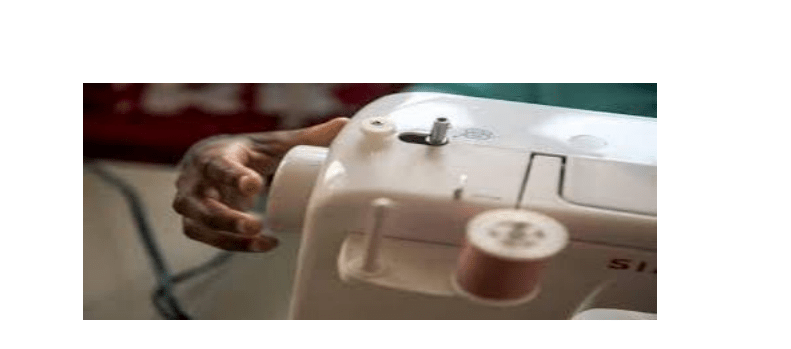
A domestic embroidery machine, also known as a home embroidery machine, is a smaller, user friendly sewing machine designed for hobbyists, home crafters, and embroidery enthusiasts.
It is typically easier to use and more affordable than commercial embroidery machines, making it accessible to a wider range of users. A beautiful method to give any clothing a personalized touch is through embroidery, which is a timeless art form. The practice of needle work is thought to be more, widely practiced today than merely a among grandmothers and housewives. Machines “stole” this traditional talent from women, who formerly enjoyed doing it as a leisure activity, a very longtime
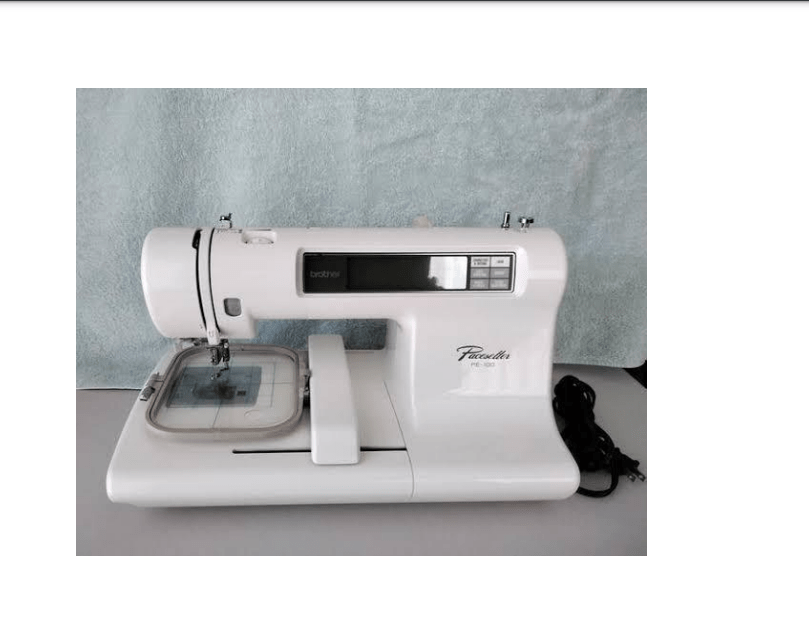
ago. Nowadays, embroidery machines are capable of producing even the most complex designs. The term “embroiderer” used to describe a lady who embroidered. Today, it has a slightly different connotation because, in any printing facility that offers computer embroidery, the term “embroiderer” refers to the embroidery machine itself. The first home embroidery machine was invented in the late 1980s by Brother International Corporation, a leading manufacturer of sewing and embroidery machines. Brother released the first-ever home embroidery machine, the PE-0, in1987,which revolutionized the home sewing and crafting industry.
Prior to the invention of home embroidery machines, embroidery was primarily a manual process that required time-consuming hand- stitching. The invention of the domestic embroidery machine not only simplified the process of embroidering but also opened up new creative possibilities for home sewers and crafters. Since Brother’s pioneering PE-100, other major sewing machine brands such as Singer, Janome, and Bernina have also introduced their own lines of home embroidery machines. The continuous advancements in technology, such as the introduction of computerized and multi-needle machines, have made embroidery more accessible and popular among hobbyists and small business owners alike.
The domestic embroidery machine contain several types of embroidery machine, they include;
1. Mechanical embroidery machine
2. Computerized embroidery machine
3. Multi-needle embroidery machine
4. Combined sewing and embroidery machine5. Small portable embroidery machine
1.MECHANICAL EMBROIDERY MACHINES
mechanical embroidery machine is a basic, manual type of domestic embroidery machine. Operates without computerized controls and usually features a knob or dial to select from limited range of built-in embroidery designs, such as flowers, animals, or geometric patterns. To operate a mechanical embroidery machine, you need to insert the appropriate bobbin, thread machine with the embroidery thread, and use the dial to select the design you want to stitch. Then, you feed the fabric under the presser foot and use the foot pedal to start the machine. Here, the machine uses the fabric material; the real fabric, needle, and threads are not attached. This machine pulls the stretched thread through the hole to make the embroidery design over the fabric. Additionally, this machine functions just like a standard sewing machine.
Advantages of mechanical embroidery machine
A. Affordability: Mechanical embroidery machineries generally more affordable than computerized models, making them a good choice for beginners or budget-conscious crafters.
B. Ease of Use: Mechanical embroidery machines have fewer features and settings than their computerized counterparts, which can make them easier to use for beginners.
C. Simplicity: Mechanical embroidery machines do not require a computer, software, or extra cables, making them straight forward to use and maintain.
Disadvantages of mechanical embroidery machine
A. Limited Design Options: Mechanical embroidery machines typically offer fewer built-in embroidery designs and customization options than their computerized counterparts, limiting the range of designs you can create.
B. Lack of Features: Without computerized controls, mechanical embroidery machines don’t offer advanced features like automatic needle threading, adjustable stitch length, or built-in pattern editing.
C. Manual Tension Adjustment: Mechanical Embroidery machines require you to manually adjust the thread tension, which can be tricky and time-consuming if you’re not experienced with embroidery.
2.COMPUTERIZEDEMBROIDERYMACHINE
Computerized embroidery machines are advanced devices that utilize computer technology to create intricate and detailed embroidery designs. These machines automate the embroidery process, allowing users to input designs digitally and have them stitched accurately onto fabrics. They consist of various components such as a computerized control panel, a needle and thread mechanism, and a hoop or frame for holding the fabric.
Key Features
- Digitization: Computerized embroidery machines can read digital design files in popular for mats such as. dst or. pes, which are created using specialized embroidery software. This digitization process eliminates the need for manual pattern tracing ands peeds up the overall production time.
- Precision Stitching: These machines offer precise stitching capabilities, ensuring consistent and flawless embroidery results. The computer-controlled mechanism ensures that each stitch is placed accurately, resulting in intricate and well-defined designs.
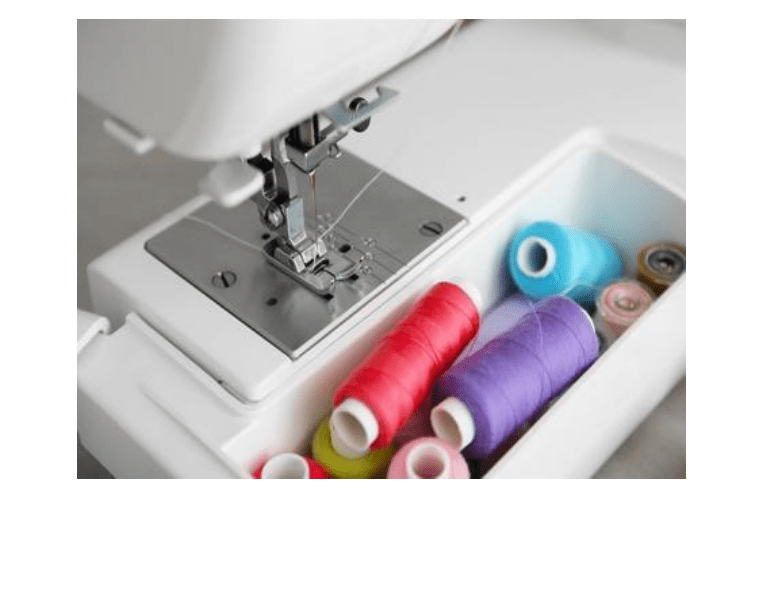
- Multiple Thread Colors: With computerized embroidery machines, users can easily switch between different thread colors within a single design. This flexibility allows for the creation of vibrant and visually appealing embroidery designs.
- Built-in Design Library: Many computerized embroidery machines come equipped with a built in design library, offering a wide range of preloaded patterns and motifs. Users can choose from these designs or customize them to suit their specific requirements.
Benefits of Computerized Embroidery Machines
A. Time and Cost Efficiency : Computerized embroidery machines significantly reduce the time and effort required for embroidery projects. The automation of the stitching process ensures faster production rates, enabling businesses to meet tight deadlines. Moreover, these machines eliminate the need for manual labor, saving costs associated with hiring skilled embroiderers.
B. Design-customization: With computerized embroidery machines, customization options are virtually limitless. Users can easily modify designs, resize them, or combine multiple elements to create unique and personalized embroidery pieces.
This level of flexibility allows businesses to cater to individual customer preferences and stand out in a competitive market.
C. Complexity and detail: computerized embroidery machines excel at creating intricate and detailed that would be challenging to achieve manually. The precision stitching capabilities and the ability to handle multiple thread colors enable the creation of complex patterns, textures, and gradients. This opens up new creative possibilities for designers and artists.
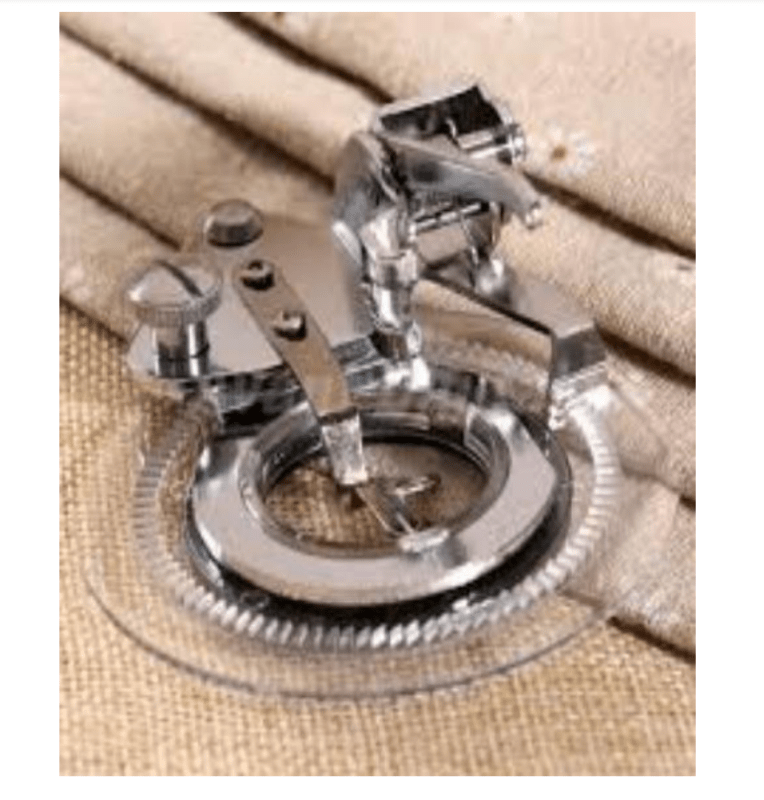
3.MULTI-NEEDLE EMBROIDERYMACHINE
Multi-needle embroidery machines are devices that perform the embroidery on fabric using multiple needles for different colors and embroidery options such as different thread types, sequins, beading etc. Contrary to the traditional single-needle machines that require frequent thread changes and are time-consuming, these machines come equipped with multiple needles and do not require the need for constant thread swaps, thus saving a lot of time. The work of multi-needle embroidery machines includes steps like:
A. Hooping The fabric to be embroidered is securely placed in an embroidery hoop or frame. Proper hooping ensures that the fabric remains taut during the embroidery process, resulting in cleaner and more accurate designs.
B. Digitizing The design is either pre-loaded from a digital file or created using specialized embroidery software. This design is converted into a digital embroidery file (usually in formats like, .dst or. pes)that the machine can understand.
C. Thread Preparation Each needle is threaded with the desired color and type of thread. Multi-needle machines have a built-in system for automatic thread trimming and changing, reducing
the need for manual intervention.
D. Stitching Once everything is set up, the machine begins the embroidery process. The multi- needle system allows the machine to work with different colors and thread types simultaneously, creating complex and colorful designs without interruption.
E. Finishing- After the machine completes the design, any loose threads are trimmed, and the fabric can be removed from the hoop. Benefits of Multi-needle Embroidery Machine
Benefits of Multi-needle Embroidery Machine
A. Multiple Needles: The distinctive feature of multi-needle embroidery machines is their use of many
needles. Ranging from six to sixteen, within as ingle machine. This enables the simultaneous stitching of diverse thread colors. Eliminating the necessity for manual thread changes during the embroidery process.
B. Color Variety: These machines can handle designs with a wide range of colors. Offering versatility and flexibility in creating vibrant and complex embroideries.
C. Efficiency and Speed: Multi-needle machines are efficient. The number of needles reduces the production time.
D. Automatic Color Changes: These machines often feature automatic color-changing capabilities. The machine can switch between needles, changing
thread colors without manual intervention.
E. Large Embroidery Areas: Many multi-needle machines have larger embroidery areas. Allowing for the creation of larger and more detailed designs. Ideal for embroidering on larger garments or many items at the same time.
4 COMBINED SEWING AND EMBROIDERY MACHINE
A combined sewing and embroidery machine, also known as a sewing and embroidery combo machine, is a single machine that can perform both sewing and embroidery functions. These machines are typically computerized and come equipped with a wide range of sewing and embroidery features. A combined sewing and embroidery machine usually allows you to switch between sewing and embroidery modes with the touch of a button, eliminating the need to have two separate machines for each function.
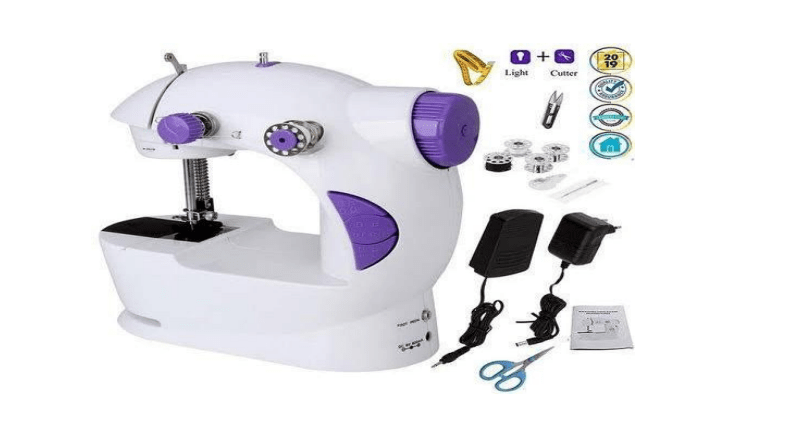
5 SMALL PORTABLE EMBROIDERY MACHINE
A small portable embroidery machine, also known as a mini embroidery machine, is a compact, lightweight, and easy-to-transport device used for embroidering small projects like patches, hat logos, and other decorative items. These machines are smaller than standard embroidery machines, making them easier to store and more convenient for traveling or taking to craft fairs or events. Some portable embroidery machines even come with built-in designs and lettering, which can be useful if you’re just starting out or don’t want to
invest in expensive software.
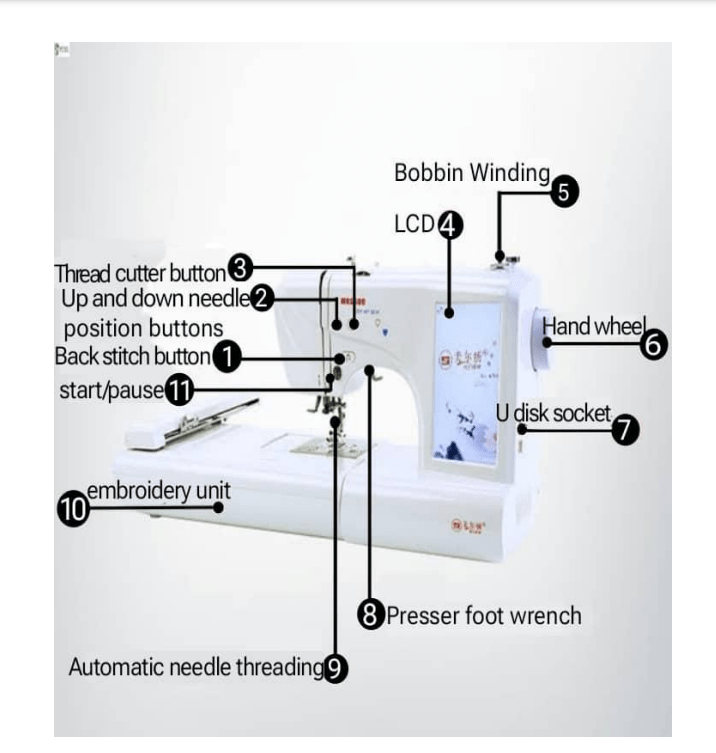
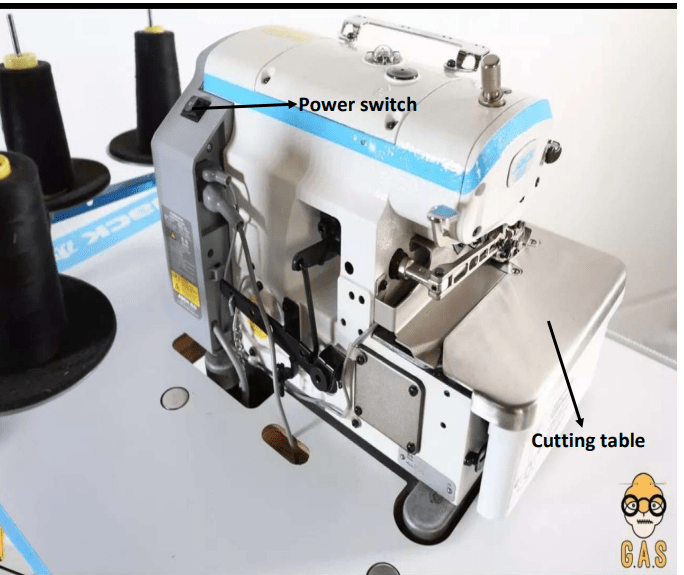
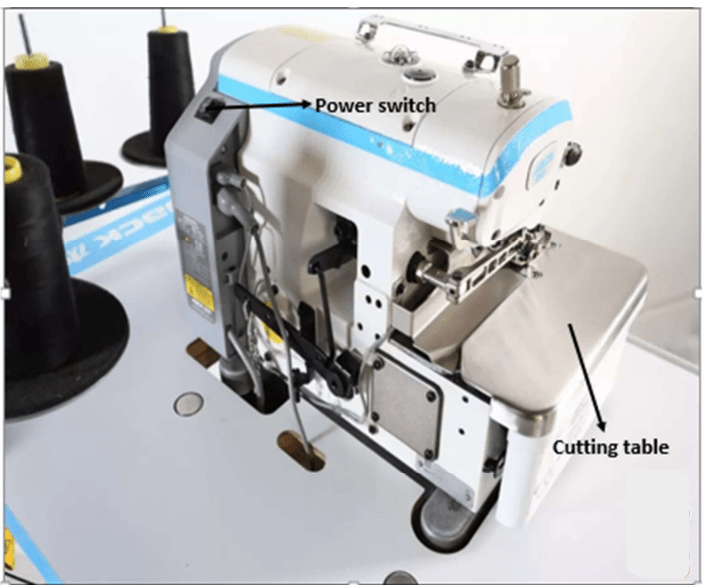
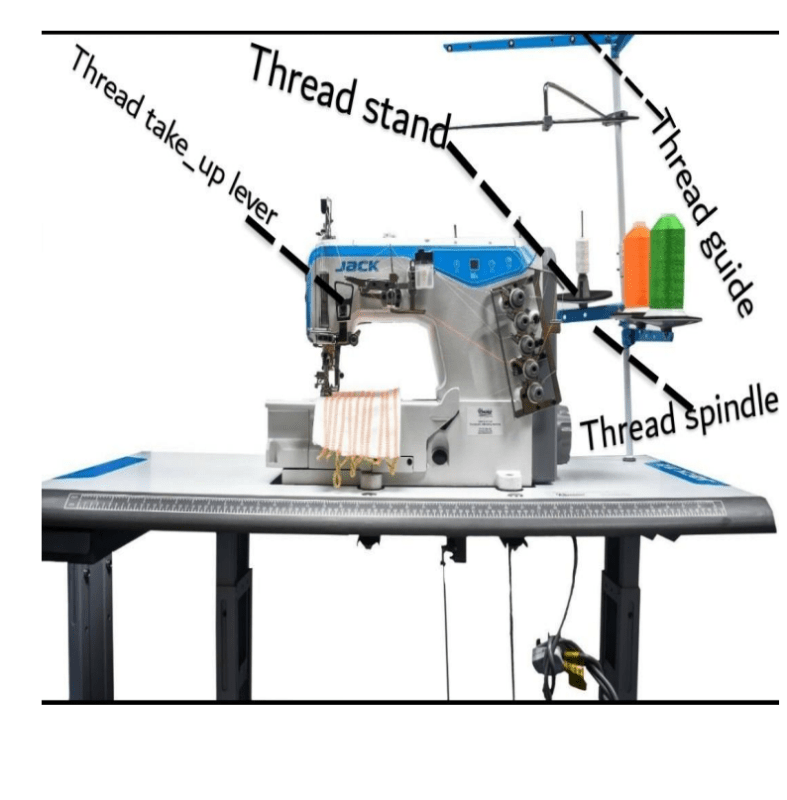
Functions of the parts labeled
- Backstitch button: The back stitch button is used to make run stitch outlines thicker without creating unwanted connecting stitches. It also helps to prevent the stitches from unraveling over time and provides extra strength to the seam.
- Up and down needle positions: The up and down needle position is an essential feature used for adjusting the position of the needle, making precise turns or pivots and knotting or locking stitches.
- Thread cutter button :The thread cutter button also known as” Thread-snip” is used to snip thread at the beginning and end of each stitch as well as trim and grade seam allowance.
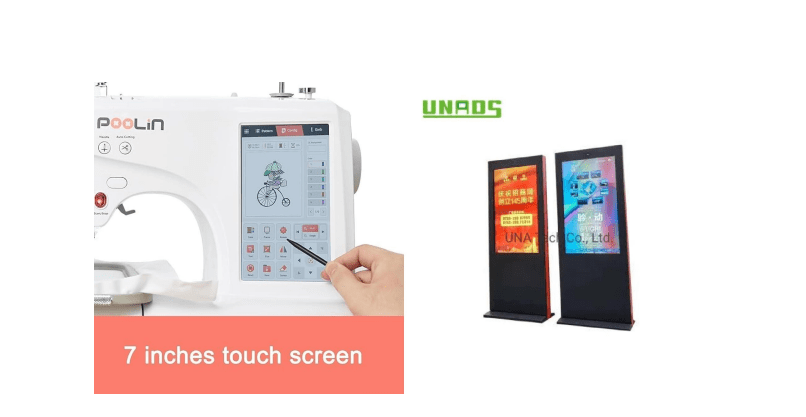
- The LCD: The LCD display is used to display the screen with high resolution.
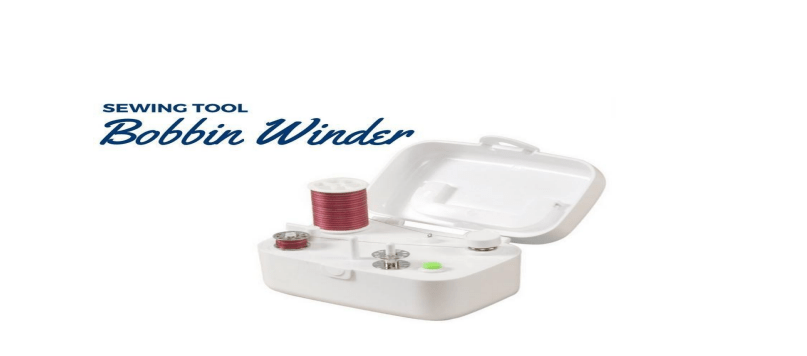
5.Bobbin winding: The bobbin winding is used to wind the thread on the bobbin and helps to distribute the bobbin thread evenly so that it will be compatible with the tension of the embroidery machine.
6.The hand wheel: The hand-wheel helps to slowly turn the needle by hand.
7.U disk socket: The U disk socket is used for the storage and transfer of embroidery designs.
8. Presser foot wrench: The presser foot wrench keeps the fabric flat so that it does not rise and fall with the needle and pucker as it is stitched.
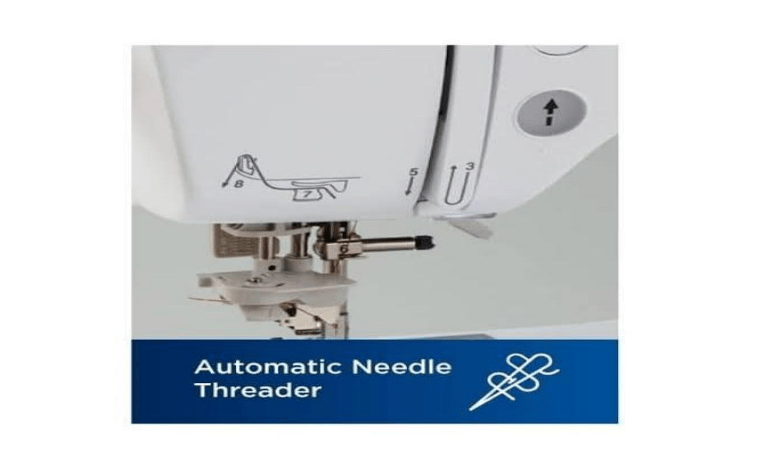
9.Automatic needle threading: The automatic needle threading is a lever that guides the eye of the sewing needle, it helps to put thread through the eye of the needle.
10. Embroidery unit : the embroidery unit also known as accessory box is used to store the presser feet, bobbins, needles and tools neatly so they are always visible and easily accessible.
11.Start/pause button: The start/ pause button helps to resume or stop your embroidery project at any time.
Domestic embroidery machine maintenance
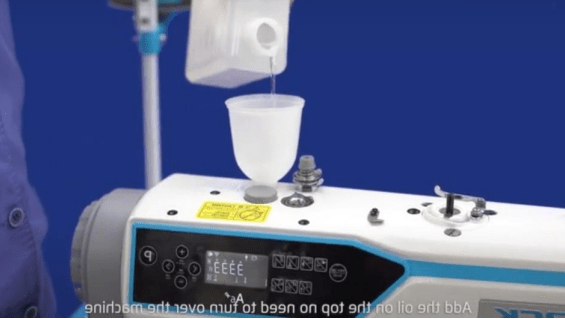
- Clean Regularly: After each use, clean the machine’s surface and bobbin area to remove lint and dust that could cause the machine to malfunction. 2. Oiling: some embroidery machines require
regular oiling of the moving parts, typically after about 8-10 hours of use. Check your machine’s manual for specific instructions on oiling. 3. Check Needles and Bobbins: Inspect your needles and bobbins after each use to ensure they are not damaged or worn out. 4. Keep Your Machine Covered: When not in use, cover your machine with a dust cover to protect it from dust and debris. 5. Service Your Machine: Depending on the manufacturer’s recommendations, service your machine annually or bi-annually to ensure it’s in top condition. This can include routine maintenance like adjusting
tensions, lubricating internal parts, and general cleaning. 6. Store in a Safe Place: When not in use, store your machine in a cool, dry place, away from directs unlight and extreme temperatures that could damage the internal components.
Safety precautions to be taken while handling an embroidery machine.
- Read the Manual: Make sure you read the manual before operating your embroidery machine to under stand its features, limitations, and safety warnings.
- Unplug Machine Before Cleaning: Always unplug your embroidery machine before cleaning or servicing it to avoid electrical shock.
- Cover Exposed Wires: Keep cords and wires tidy and covered to avoid tripping over the mor exposing them to potential damage.
- Be Mindful of Children and Pets: Never leave your embroidery machine unattended when small children or pets are present, as they could be harmed by moving parts or hot surfaces.
- Wear Protective Gear: When using your embroidery machine, wear protective gear, like safety goggles or a face shield, to guard against flying objects and potential needle breakage.
- Don’t Force It: If your machine jams or starts making strange noises, don’t force it. Tur nit off,
unplug it, and refer to the manual for troubleshooting steps
50 Questions Multiple choice questions
Part 1
- Machine embroidery is an embroidery process where by an embroidery machine is used to create_______ on textiles. A) Lines. B) Circles. C) Patterns. D) Dots.
- Machine embroidery is used commercially in__________
A) Product branding. B) Corporate advertising. C) Uniform adornment
D) All of the above - Machine embroidery is used by_________
A) Nurses. B) Crafters. C) Bankers. D) Cobblers. - Examples of machine embroidery includes designs on________
A) Quilts. B) Pillows. C) All of the above. D) None of the above. - Domestic embroidery machine is also known as A) Portable embroidery machine. B) Home embroidery machine. C) Computerized embroidery machine. D) Multi-needle embroidery machine.
- _________ Is a timeless art form. A) Painting.
B) Singing. C) Embroidery. D) Drawing. - _________ was used to describe a lady who embroidered. A) Tailor. B) Seamstress. C) Embroiderer. D) Crafter.
- In printing facilities that offer computer__________
embroidery, the term “embroiderer” refers to
A) The lady
B) The Crafter. C) The embroidery machine. D) None of the above. - The first home embroidery machine was invented in the late__________
A) 1970s. B) 1950s. C) 1980s. D) 1900s. - The first home embroidery machine was invented by__________
A) Brothers international landmark. B) Brothers international organization C) Brothers international corporation. D) All of the above. - The first home embroidery machine to be released was the ___________. A) BE-100. B) PE-1000
C) BE-1000. D) PE-100. - The domestic embroidery machine contains several types of embroidery machine except__________
A) Small portable embroidery machine. B) Big portable embroidery machine. C) Computerized embroidery machine. D) Multi-needle embroidery machine. - __________embroidery machine is a manual
type of embroidery machine. A) Small portable. B) Computerized.
C) Multi-needle. D) Mechanical. - _____________ embroidery machines are advanced devices that utilize computer technology to create intricate and detailed embroidery designs. A) Multi-needle. B) Computerized. C) Combination. D) None of the above.
- ____________embroidery machine makes use of multiple Needles.
A) Computerized. B) Multi-needle. C) All of the above. D) None of the above. - _____________embroidery machine can perform both sewing and embroidery functions. A) Multi-needle. B) Computerized. C) Combined sewing and embroidery. D) All of the above.
- Small portable embroidery machine is also known as__________
A) Mini embroidery machine. B) Medium embroidery machine. C) Maxi embroidery machine. D) Little embroidery machine. - __________ Is an advantage of mechanical
embroidery machine. A) Affordability. B) Ease of use. C) A and B. D) None of the above. - __________Is a disadvantage of mechanical.
embroidery machine. A) Limited design options. B) Simplicity
C) Lack of features. D) A and C - ___________are key features of mechanical.
embroidery machine. A) Digitization. B) Precision stitching. C) Multiple thread colors.
D) All of the above. - All these are done in the maintenance of an embroidery machine except_________
A) Oiling. B) Watering. C) Store in a safe place. D) A and C - Which of the following is not done in the maintenance of an embroidery machine. A) Check needles and bobbins. B) Do not service your machine.
C) Oiling. D) Service your machine. - Store your machine away from _________ A) Direct sunlight. B) Embroiderers. C) Facilities. D) Cool dry place.
- Inspect your needles and bobbins to ensure that they are not_________
A) New. B) Whole.
C) Damaged. D) None of the above. - Oil your machine after about _______to ________hours of use. A) 0 to 10. B) 2 to 3. C) 8 to 10. D) 10 to 20.
- _________are maintenance taken while handling an embroidery machine. A) Read the manual.
B) Unplug the
machine before
cleaning. C) Cover exposed wires. D) All of the above. - When using an embroidery machine, wear protective gears like_________ except. A) Safety googles. B) Sun glasses. C) Face shield. D) None of the above
- One out of the following is not a precaution to take when handling an embroidery machine. A) Read the manual. B) Oiling. C) Wear protective gears. D) Be mindful of children and pets.
- What do you do when your embroidery machine starts to make strange noises?
A) Force it. B) Do not Force it. C) Do not unplug it. D) Do not refer to the manual. - Do the following when your machine starts making strange noises except__________
A) Do not Force it. B) Do not unplug it. C) Refer to the manual. D) Unplug it.
Fill in the gap.
Part B; Fill in the gap with the appropriate answers.
31. _______prevents stitches from unraveling over time.
- _________is used for adjusting the position of the needle.
- _________is also known as “Thread-snip”.
- _________displays the screen with high resolution.
- _________ is used to wind the thread on the bobbin.
- ___________helps to slowly turn the needle.
- __________is used for the storage of
embroidery designs. - ___________guides the eye of these wing
needle. - Another name for embroidery unit is_________
- __________helps to stop an embroidery project at any time.
- __________is used for knotting or
locking stitches. - ________is used to snip thread at the beginning and end of each stitch.
- _________ distributes the bobbin thread evenly.
- _________is used for transfer of designs into the embroidery machine.
- The hand wheel makes use of the___________ to slowly turn the needle.
- __________helps to keep the fabric flat while stitching.
- __________helps to put thread through the eye of the needle.
- ___________helps to resume an embroidery project at any time.
- ___________is used to store the presser feet,
bobbins, needles and tools. - __________helps to make run stitch outlines thicker
without creating unwanted connecting stitches.
Answers to fill in the gap questions 31-50
31) Backstitch button.
32) Up and down needle positions.
33) Thread cutter button
34) LCD.
35) Bobbin winding.
36) Hand wheel.
37) U disk socket.
38) Automatic needle threading.
39) Accessory box.
40) Start/pause button.
41) Up and down needle positions.
42) Thread cutter button.
43) Bobbin winding.
44) U disk socket.
45) The hand.
46) Presser foot wrench.
47) Automatic needle threading.
48) Start/pause button.
49) Embroidery unit.
50) Backstitch button.